


LONG AWAITED UPDATE! Lots of pretty significant stuff so let's just call it Version 2.0!
(This is just a quick overview. For full details see the full description/documentation below.)
- UI changes (less colorful = more serious!)
- fixed loop indicator off by 1 (just a minor visual problem)
- Reset Module now also resets playback positions
- right-click menu overhaul:
- user shape saving and loading
- import data from external audio files
- per-canvas undo
- shape transforms, classic shapes, random generators
- % and # knobs to use as parameters of many menu functions
- optional keyboard controls for most menu functions
- playback options
- "Loop" toggle is now "One Shot" toggle: same function, though inverted, because it just makes more sense this way
- gated playback toggle
- now three playback modes! free running mode, sync mode, and cv-controlled phase mode
- new knob in rate section for more control, function depends on rate mode (more knobs = more fun!)
Create your own custom control signals! JK's CV Canvas lets you draw up to four different control signals, read them in many different ways, and output them to use in whatever way you like. Initially begun as a "draw your own LFO" module, the CV Canvas has enough playback options and flexibility to support many more uses, including as an envelope, a gridless sequencer, or an automation curve.
Basics: left-click and drag to draw on any of the four canvas areas with your mouse, hit play in that color's control area, hook up the Out jack to whatever you want to control. It's that easy...but there's plenty more and you can read below for full details/instructions.
Readers
Each corner of the module contains a shape reader which is linked to the similarly colored canvas shape in the central window. Each has the same controls.
General Controls
- Range: Colored knobs set the loop points. Start and end are arbitrary as the leftmost point becomes start while the rightmost becomes end. Input jacks, with associated attenuators, allow for CV control of the loop points.
- Play Toggle: Starts the reader.
- Play Jack: Receives CV trigger to start playback. In One Shot Mode, also restarts read position. In Gate Mode, turns playback on and off depending on input gate status.
- Stop Toggle: Stops line reader.
- Stop Jack: Receives CV trigger stop playback.
- Reset Toggle: Resets the read position to loop start.
- Reset Jack: Receives CV trigger reset read position.
- One Shot Toggle: Turns on One Shot Mode. Playback automatically stops on reaching end point.
- Gate Mode Toggle: Turns on Gate Mode. Gate Mode allows CV input to Play Jack to control playback. High gate starts/continues playback, while low gate stops it.
- Lag Knob: Smooths the output by slowing its rate of change.
- Polarity Toggle: Define whether the line operates in bipolar (on) or unipolar (off) fashion. This also affects some of the special drawing functions below.
- Main Attenuator: Sets the amplitude attenuation of the final voltage output.
- Out: This is the thing where the things come out.
Rate Section Controls
The Rate section provides three ways to control the playback rate of the shape reader, selectable via the three toggles. There is also a colored Main Knob, a white Auxiliary Knob, an input jack, and a black attenuator knob for the input jack. The specific range and function of each knob changes depending on the selected rate mode.
Free Mode
The first, with the Play symbol on it, selects Free Mode. This is the original free-running mode, though with a couple new adjustments.
The Main Knob controls the base rate. At start, this ranges from -1 Hz (backwards) to 1 Hz, or one full loop read per second.
The Auxiliary Knob selects the rate multiplier. Available values are 0.1, 0.5, 1 (no change), 2, or 10.
The CV input allows modulation of the playback rate. It expects input of -5 V to 5 V which corresponds to a range of +/- twice the current set rate.
Both the tooltip and manual value edit for the Main Knob take into account the loop length (start/end) and the multiplier setting when calculating the Hz value.
Sync Mode
The second toggle, with the quarter note on it, toggles Sync Mode.
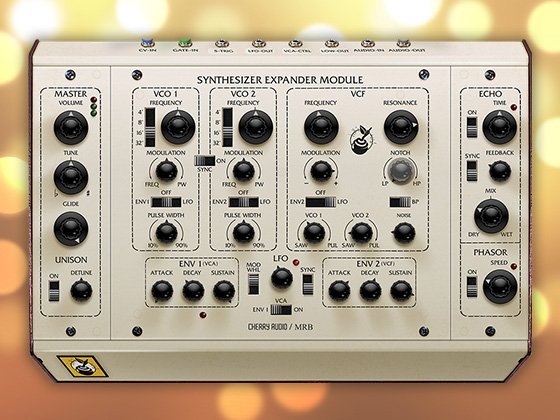
Sync Mode expects a 96 PPQN sync signal in the input jack. This typically comes from VM's Sync Generator module or from the Sync Out jack in the Transport section at the top of VM.
The Main Knob sets the note value. Available lengths range from sixteenth notes to 4 bars.
The Auxiliary Knob further adjusts the note value. This makes it possible to have dotted (+50%) note lengths, as well as triplets, quintuplets, or even septuplets.
The input attenuator has no function in Sync Mode. :(
Also note that, for maximum flexibility, Sync Mode only adopts the timing provided by the sync signal. To be perfectly in phase with other modules or external music, the user will typically need to trigger a playback position reset on the first downbeat. For example, when reading a host's sync signal from Sync Out in the Transport section, hooking the Play output to the appropriate reset jack(s) in the Canvas module will ensure playback is in phase with the rest of your audio.
Phase Mode
The third toggle, with the phi symbol on it, toggles Phase Mode.
Phase Mode allows direct CV control of the shape reader's playback position (similar to the Sample Scrubber, for those familiar with that module). In this mode, the input jack expects a CV input in the usual range of -5 to 5, and maps that range to the playable range of the current shape (-5 is start, 5 is end).
The Main Knob acts as a phase offset.
The Auxiliary Knob sets the lag time for the input signal, thus slowing its rate of change.
The input attenuator simply attenuates the signal as expected, so reducing the input amplitude effectively shrinks the reading range.
Canvas
- Left-click: Set a point.
- Left-click and drag: Draw a line.
- Left-click + Ctrl: Fine smooth. (Retains most of the drawn line but rounds off sharp corners.)
- Left-click + Shift: Coarse smooth. (Heavier smoothing, turning entire line into more gradual curves.)
- Left-click + Alt: Clear shape. (Sets to bottom for unipolar, center for bipolar.)
- Right-click: Open function menu.
Menu Functions
Note that many of the functions below can alternately be run by using Alt + letter key. The menu contains hints showing which letters trigger which functions. Just be sure the module has focus and you are hovering over one of the canvases first.
The menu also has hints showing which functions use the # or % knobs.
Top Level
Common useful operations.
- Copy: Copy selected shape.
- Paste: Paste copied shape. (Note: Copy and Paste functions also work between separate instances of CV Canvas.)
- Clear: Clear all points to polarity-appropriate zero. Same as Left-click + Alt.
- Undo: Undo last action on currently selected canvas. Each has its own buffer of 16 undo levels that operate completely independently from each other and from VM's undo. Can also use the Backspace key when hovering over the desired canvas.
Transforms Sub-Menu
Operations that change the existing line in various ways.
- Invert: Flip the line's points along the horizontal center.
- Reverse: Flip the line's points along the vertical center.
- Smooth: Average the line. Small % settings will just round off sharp corners, high % settings will perform extreme smoothing.
- Add Dust: Randomize a few points. % sets the max amplitude of the points and # sets the density (# value x 4).
- Add Noise: Adjust each point up or down by a small random amount. % sets the max amplitude of this adjustment.
- Fade Out: Fade the points to zero (polarity dependent!). % sets the position at which the fade out begins.
- Fade In: Fade in from zero (polarity dependent!). % sets the position at which the fade in is complete.
Shapes Sub-Menu
Load from a small selection of preset lines.
In each case, # sets the number of cycles of the generated shape.
Also, polarity matters! Where appropriate, each shape will start on zero.
- Sine: Sinusoid. Smooth curve.
- Triangle: Linear up and down.
- Saw: Linear up until maximum, then begin again at minimum.
- Square: Alternating minimum and maximum.
- Impulse: Single points at full amplitude, evenly spaced across an otherwise zeroed line. Useful as evenly-timed triggers.
Generators Sub-Menu:
Generate various types of random shapes.
- Uniform: Completely randomize every point in the canvas.
- Brown: Draw a line by performing a random walk. # controls the slope (vertical change per horizontal change) of the line - generally better with small values.
- Dust: Clear the shape, then randomize some points. # sets the density (# value x 4).
- Sample and Hold: Draw a series of random stepped values of equal length. # sets how many different values to sample (# value x 2).
- Sample and Ramp: This is the same as Sample and Hold except with this function a ramp is calculated between the random values.
- Sines: Something weird just for fun. Generates # equal length sine waves, each with a randomized wavelength. Just try it! Note that low # values are pretty lame.
File Sub-Menu:
- Save Shape: Save your own custom shapes wherever you want. Files use the extension jkshape.
- Load Shape: Load a saved jkshape file.
- Import: Load data from an external audio file (.wav, etc.).
Import: Truncate vs. Resize? Huh?
The Import function is primarily intended for those users who want to load single-cycle waveforms from their collection and use them in the CV Canvas. Due to the inherently intertwined nature of the pixel drawing and the actual data point storage, at this time only 576 points of data exist. (This may increase in the future.) If an imported file is 576 samples long or less, it loads without issue, with any extra points staying as zero. For files bigger than 576 samples (i.e. most of them probably), you have the choice of either loading the first 576 points and dropping the rest (Truncate) or loading all points and then mathematically scaling them to fit into 576 points (Resize). Of course neither option is perfect, but one or the other might be better depending on your specific needs.
Note that you can also import full audio files with the Resize option and, while losing a ton of information (tens of thousands of data points versus 576) still end up with an interesting curve to work with. It's worth experimenting with to get unique shapes. As one example, I've found kick drum samples to be interesting.
Bottom controls
Finally, we get to the controls in the bottom central area of the module. By this point this stuff should be pretty obvious.
The play, stop, and reset buttons/jacks are global and will override the current state of each reader.
The Clear All button does just as it says: it sets each canvas to polarity-dependent zero.
The % and # knobs, as endlessly mentioned above, are used for the settings of various generation functions.
Post any comments, questions, concerns, feature requests, or bug reports on the forum or send an email here. And finally, have fun with it!
agentslimepunk
Feb 4, 21
I love it already!
I had no idea I needed a CV canvas until now, but I'm really glad this exists; having the ability to generate random steps, add noise to my weird homebrew curves and have 4 of them going at the same time at completely different speeds just feels like a CV gamechanger.
I highly recommend this module.
JK's CV Canvas
$16.00 $20.00